But first, coffee
Who else feels like this in the mornings? Especially on a Monday.
We had a really nice weekend, dinner and movie with friends, (finally saw Argo) scrubbed down the whole house, family time and lots of time outside at the dog park with our little canine lady.
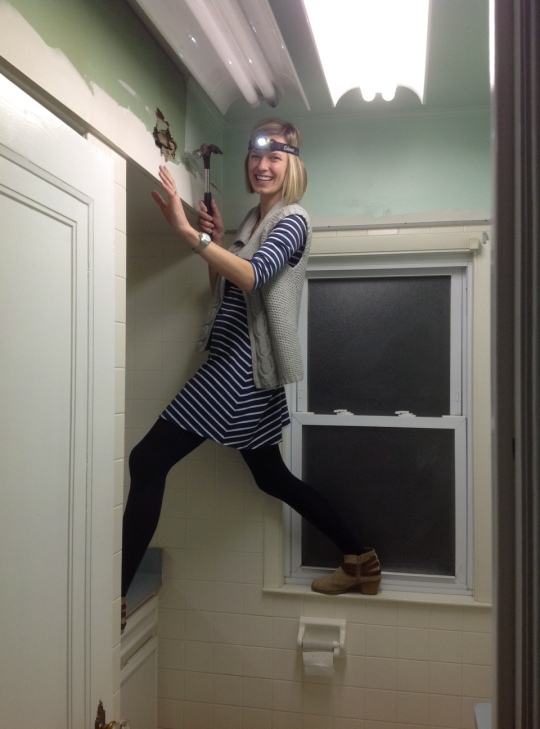
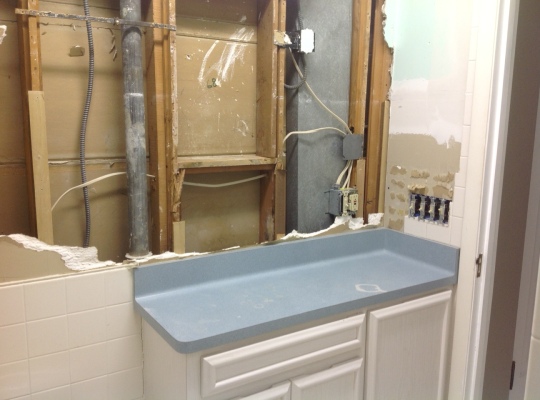
We’ve also been working on this…
Let’s renovate the first floor bathroom…but first, coffee.
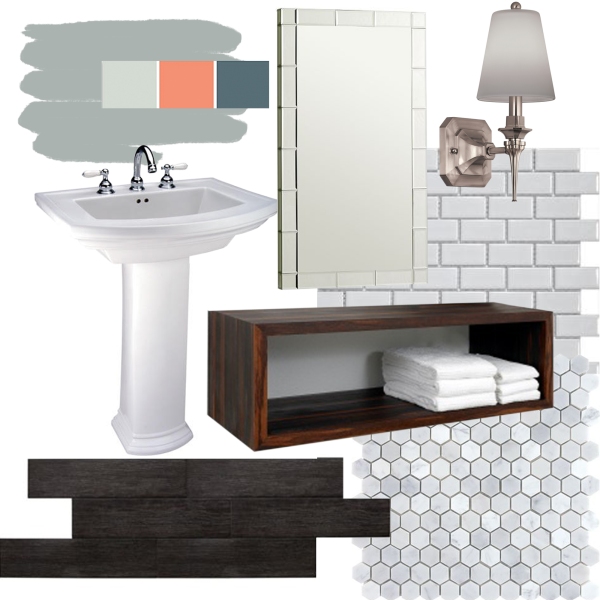
And here is what we have in mind for the final project…
Who Knew…
Who knew my wonderful Nick could turn an attic space from this…
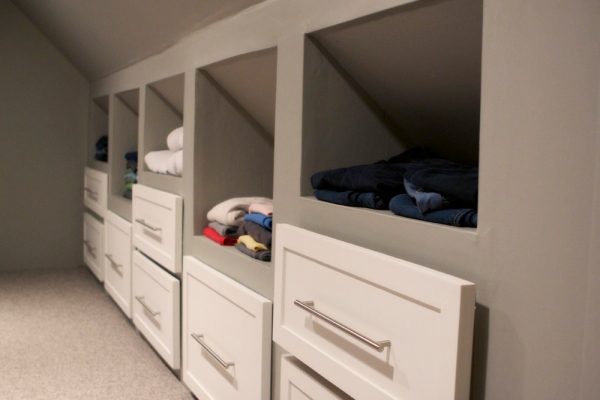
into this..
Not I! And I don’t think he did either. I say this in the most loving way possible… but two years ago, we were living the apartment life, his tool box consisted of a hammer, a few nails and probably some duck tape. The biggest project he did was assemble a target tv stand (which is still kickin’ in our living room) and hang a photo or two on the wall.
Then we bought a house that needed a little love.. and he got the itch. He built a table…fenced in our yard (which I have yet to blog about!) a double desk,.and a few other projects. Christmas and birthday wish lists turned into tools..the work bench grew….lots of youtube videos and a gained sense of confidence and he’s exceeding all of our (and I would guess his own) expectations.
Seriously, this project was all him..with some help from loving friends and family who decided that insulating 2×4’s, picking us up at Home Depot after we bought a giant carpet roll or plywood that didn’t fit in our car, or mudding drywall seemed more fun than a day in the office. I can’t understand that type of male bonding..but I appreciate it, so thanks!
I’m not going to give you the play by play..because it would bore you..and if you plan on doing this yourself, I’m the last person to be instructing you on how to do it..so enjoy some photos instead.
When we looked at this house, we saw this extra space and were completely creeped out by it, but knew it had potential to be built out.
No lights, no window. Just a lot of dark wood, a vent that was probably home to bats, lots of old owner junk and a dabble of insulation.
These photos don’t do the creepiness factor any justice. They were taken after everything was cleared out, which took us a good year to even attempt to do. This baby was HOT HOT in the summer and very COLD in the winter so we pretty much kept it shut for a year hoping that things weren’t living in there.
Here is where the closet is in relation to our bedroom.
You can see that we have a smaller closet, which had all my clothes in it. Nick used the guest bedroom closet. We actually have an even larger space behind our bedroom, which is more attic space, but the slope is alot steeper and the ceiling is a little lower. There is potential to build that out someday…far far away.
The door into the closet is so unique, a custom shape and it’s splits to open half way. I’m not exactly sure the purpose of it, but it makes a great coat check door or a door for Mr Ed the horse. The door has since been removed and is being stripped. Not sure if we want it to stay white, or possibly stain the original wood a dark color to match our floors.
Do you see those bare light bulbs in all the photos? When we moved in we immediatelygot rid of the shades on the wall lights, and are since kicking ourselves for not keeping them. After 5 different failed attempts to find shades that fit, we are forced to take the DIY direction.
The final {now carpeted} space is 5 feet wide and 20 feet long, has 3 ceiling lights, 3 outlets, a new window, 8 large pull out drawers, 5 built-in shelves, a 4 shelf center unit with baskets and 2 long poles for hanging. Bonus! We can both {barely} stand in the space {which is a big deal in these old houses}.
We primed and painted all of the drawers, added trim to the outside for a more custom look and added large handles. Here’s what we found for the drawer pulls (which we love!) Save some ca$h and don’t forget to hunt online! Even with S&H we saved a lot of money on what was almost the exact piece of hardware at each store.
So here I am, finishing up this post, staring into the closet, and out the snowy window waiting for the day we can lay in bed with the fresh air blowing in.
So there you have it folks. Our attic closet transformation by my lovely husband, number cruncher by day..contractor extraordinaire by night.
Rollin’ With My Homies
Raise your hand if {for whatever reason} this might be one of your favorite scenes from the movie Clueless.
Come on – you know you’ve all waved your hands in that “rollin'” motion and said that ‘famous’ line.
If you know exactly what I’m talking about {and you made the hand motion at your desk just now} then you will be happy to see a print that I just added to my etsy shop.
I’m selling this quirky 8″x10″ printable file for only $10. This would be the perfect kitchen framed art print for your Clueless lovin’ friend. You purchase the image, choose your colors, and I email you the file to print wherever it’s convenient for you. That simple! Click here to purchase the printable file today!
Don’t see what you are looking for on my Etsy site? Contact me and we will work together on your custom design needs.
Well, Hello There 2013
Well the New Year has come and gone and I am off to a great start with my blogging. It’s amazing..I’ve written a total BIG FAT ZERO posts so far this year. Yikes! So to kick start me back into the blogging world, I thought I would look back a year ago, to a post I wrote on my Birthday of all the things, both big and small, that I wanted to focus on >> Read the post here<<
This is the part where I blast myself, in front of you all, to either share my success, or make myself vulnerable and accountable to work on the things that didn’t quite happen last year.
So here we go…a reflection of my list of 26 on 26 from year ago..
1. Buy higher thread-count sheets – Maybe we have a 5-year wedding vow renewal celebration and register for gifts?
2. Play more games – My sister got me a new group party game last week, and my friend got me a mini travel game of scrabble.. Who’s ready for game night at the Hansen’s?!
3. Spend more time at the library..even if it’s just to browse – We got really into books on CD this summer on our road trips..I can now tell you all about Steve Jobs and the creation of Apple…and also, with no shame, I can tell you all about The Confessions of a Shopaholic.., variety is the spice of life, and library’s got a good selection 😉
4. Complain less – Ehh..well.. probably not. And to be honest, I haven’t really thought about this one until just now, so it’s safe to say I need to file this in my “to work on in my 27th year” file.
5. Find the right church for us – This is the one I feel the most eager about. Not disappointed that we haven’t found the church, and not that it’s not out there, but the fact that we didn’t put as much time or effort into this as we wanted to. No reason..busyness…tiredness…out of town…all very bad and lame-o excuses. I certainly don’t want this to be a forced thing, but it’s something that is important to Nick and I and we can’t expect it to happen without our efforts. We actually went to a church this past weekend, didnt get that good feeling, but found a different one that we are going to this Sunday. We have a good feeling about this one.
6. Get more sleep – As I type this at 11:45..the answer is no. Although I do have to say, we have been doing the Insanity workouts in our household, forcing me to wake up earlier and get my booty moving in the am…causing me to crash earlier in the evenings. I have never felt more rested as when I’m in that routine.
7. Grow out my hair – Well I was on the right track..and then the Aveda Institute where I work needed a haircut model for a famous guest educator (free $200 haircut..ok!)…so I did this…
and I loved it! But now I’m back to wanting to grow my hair out…Which we all know will reach a certain point, and I will make a last minute call, without much though, and chop it off again. It’s what I do. An endless cycle.
8. Call my friends and family more – I try…I really do because I know that it is important and I value y relationships to the highest degree… but the truth is, I’m just not a phone talker. Never have been. I LOVE to talk in person..could chat your ear off…but there is just something about a phone. I have to amp myself up to call someone “just to chat” – Is that weird? Anyone else out there like that?
9. Send more snail mail – I have been buying more cards when I see them on sale or just to have..and have been adding more birthdays/anniversaries/holidays to my calendar to make sure to get those cards out. I LOVE sending cards and I LOVE receiving them so this is something that will always be important to me. PS Did you know Target puts their nice cards on the clearance end caps? You know the fancy ones with die-cuts, glitter or little embellishments..the ones that I normally have to skip over because they are more than $5 a card. Look for clearance cards after the holiday..and save them for next year.
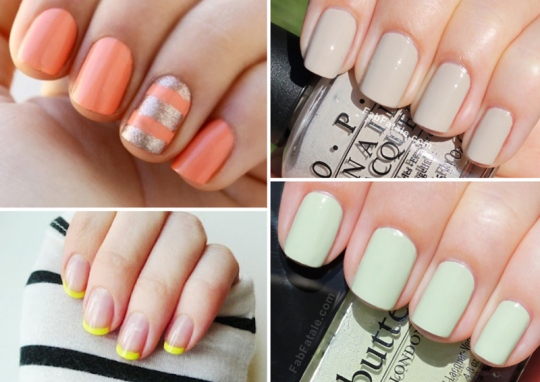
10. Keep my nails painted…. nope but I think if I got one of these cute spring manicure it would help
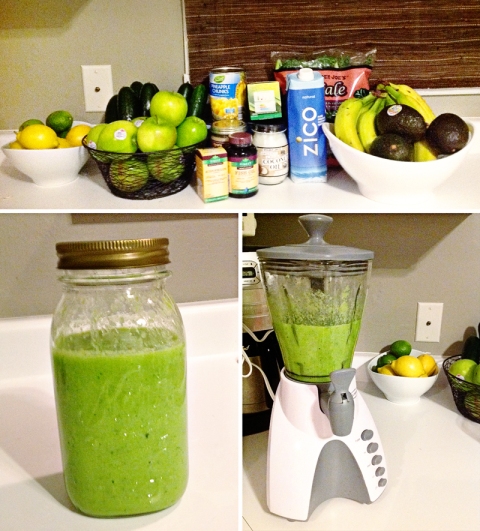
11. Eat More healthier foods – even if it costs a little more – As much as I would love to shop all organic at Whole Foods..it’s a little too expensive so we at least try to stick to the Dirty-Dozen when grocery shopping (think of it as eating “poorganically”) and we actually completed a 3-day detox cleanse last week.
I loved the cleanse and felt great to re-set my body. I was never hungry and had tons of energy.
12. Volunteer I am SO happy to say YES to this one. With two other women, I have started a Milwaukee Chapter of Dining for Women – an organization that meets once a month, 10-30 women that “dine-in”, raise money for grassroots organizations and discuss topics that aid suffering woman around the globe. Read more about it here on my friends blog and watch the NBC story that originally inspired us here >>
13. Learn to knit...not even close..and I’ve moved onto wanting to learn the art of calligraphy. I adore the scrolling handwritten art and would love to be able to address envelopes and gifts with beautiful swirly goodness.
14. Make more time to pray..not any less..but not any more and Im hoping this will go hand in hand once we find our church
15. Pay for someones coffee behind me at Starbucks...it’s fun..I encourage you all to try it!
16. Travel more –We took a great trip this fall to the east coast to visit our friends who are living in Boston. We spent a few days in the city with them and a few days exploring Maine and hiking the White Mountains of New Hampshire. We had an amazing time, the weather was beautiful and have the itch to Jet set again soon.
17. Learn to trust my instinct – Nope. Still too much {over}thinking and not enough just doing.
18. Wear lipstick – Yes! Ive found 2 Aveda colors that I love for the spring / summer..not as life-changing as I thought, and Im probably that girl you see in public with lipstick on her teeth, but makes you feel a little more put together none the less.
19. Break my habit of magazine hoarding..It’s come to the point in our house that I don’t even get a warning anymore..if i don’t read / clip from them in time..i know they will be gone
20. Listen more….Wait…what did you say?
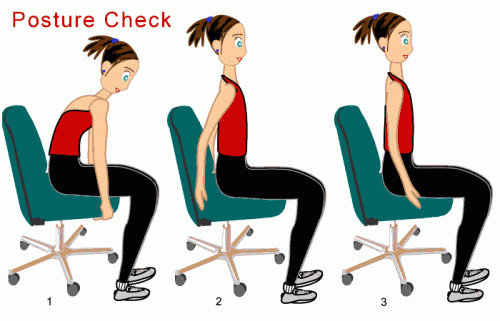
21. Better posture..maybe I need a post-it note on my computer…Does anyone have any suggestions for better posture at an all day computer job?
22. Learn lots more about photo post-processing..I’ve taken a few classes and have learned lots but have also learned that I have SO much more to learn..and that everyone does it differently, I’m hoping the more photos I take and work though, the more I will develop my own workflow.
23. Get to know our neighbors better..YES! We are SO in love with our neighborhood and our neighbors. We had a few different block parties for the holidays..regularly get together with our neighbors, nick joined a neighborhood softball team and we are starting a Friday Happy Hour on our front yard this summer. You are all invited. BYOB!
24. Fold the laundry…nope.. Instead my husband built us a wonderful large closet so I have room to hang everything instead of struggling to fold…maybe I should get a part time job at Abercrombie folding tees? This just in ..I just came across this video How To Fold Like Holister Sign me up little tween…teach me your skills with your tightly fitting graphic tees 😉
25. Tell my husband, my family and my friends how I really feel about them..You can never say or show them enough. I need to constantly remind myself that.
26. Learn the art of relaxation … I don’t like baths, I dont like naps, I cant lay on the couch without doing something..Im not great at relaxing, but I’m trying what I can. I’m getting better at actually going to bed when I feel tired…trying drinking caffeine tea at night..and I have a new spa Pandora station that I love playing on the ipad when I’m laying in bed.
So there you have it..my successes and failures as a 26 year old. Not too shabby I would say and look forward to a lot in my 27th year.I’ve got lots of fun stuff to share with you…things Nick and I have been up to, photos to share, room reno’s and etsy shop design..stay tuned!
What about you? Do you come up with New Years resolutions? What about trying Birthday Goals instead?
Book a mini session!
I’ve stepped out of my comfort zone and it’s been keeping me busy, folks! I’m no expert…and to actually charge money for my ‘hobby’ is a weird concept…and when people actually pay me..that’s even weirder – but i’ve been having a blast and most importantly LOVE seeing my work improve while giving these families some fun photos and designed cards!
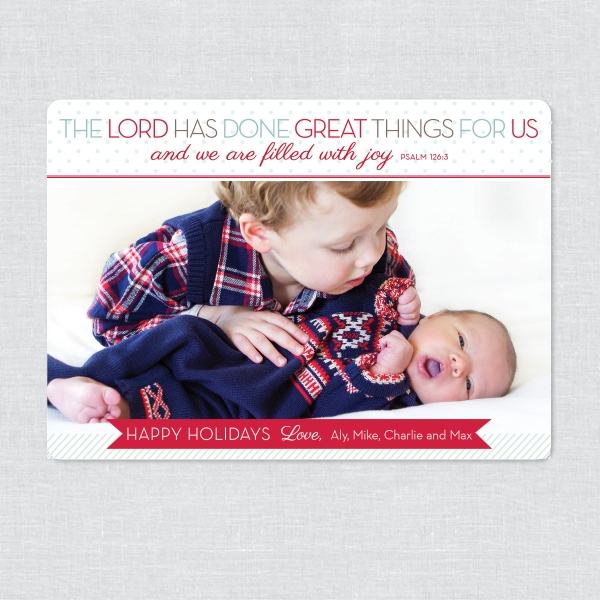
I’m now offering Mini-Photo Sessions – newborns // toddlers // family photos // furry friends // holiday card photos // engagement photos..(and yes, I know this is terrible timing right after you all just had your holiday photos taken…consider yourselves very early for next year 😉
Here’s the best part…I’m offering custom design to coordinate with the photos. Book a shoot along with the opportunity to have a personal card // invitation // announcement designed. It’s the perfect package deal.
Why a “Mini-Sesion”? They are shorter…about an hour (i’m quickly learning the attention span of toddlers…and men… ;), and are easy on the wallet, including a disk of 25 precious images plus the opportunity to show off your beautiful family and friends on a card, invitation or announcement.
Engagement Photos + Holiday Card or Wedding Save the Date
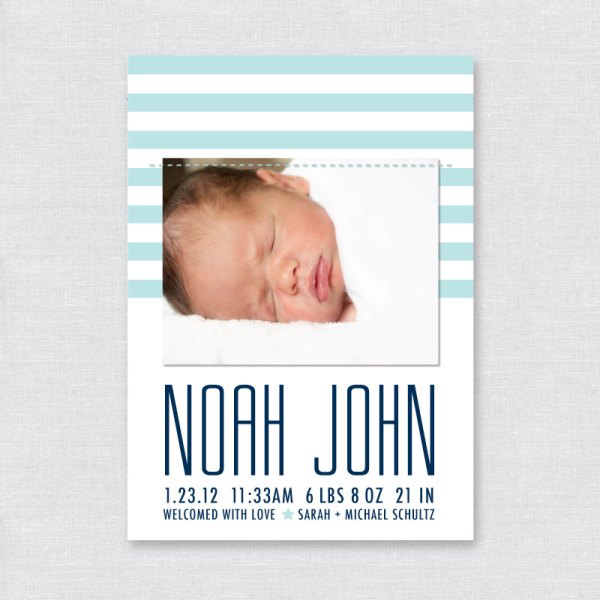
Newborn Photos + Birth Announcement
Family Photos + Christmas Card
I can’t show you the final images and designs for a lot of these sessions …don’t want to spoil the fun for the families…but here’s a small sampling of some of my work. Contact me to schedule a mini photo-session + custom design now!
For Your Mistle Toes + FREE Printable
Finishing up your holiday shopping? I have the perfect stocking stuffer, gift topper or holiday hostess gift for you!
-Nail Polish + Travel Lotion (you know I love me some aveda foot relief!)
– Clear plastic treat bag (I used this 4″x9″ gift bag from walmart / target / michaels for about $2)
And this festive custom designed gift tag, made by yours truly 😉
I have to give this woman credit for the phrase that I came across on pinterest…that’s why it’s called Pinspiration..right 🙂
Click >> HERE << to download the FREE PRINTABLE TAG !
Print the pdf (it’s better if you use thicker card-stock paper) Below is what the card looks like flattened (showing font & back)
Add the lotion, nail polish and fake snow to the bag ( you could use glitter/confetti/cotton/evergreen snippets) and fold the tag in-half over the bag and staple on the sides. Voilà! You’re a regular Martha Stewart.
The Money Trees
Have you started thinking about Christmas?
We’re normally the “not until after Thanksgiving” kind of Christmas people. It’s a little strange to think about the upcoming holiday season when it’s sunny and 60 degrees outside, but we took advantage of the weather and put up all our outside Christmas lights this weekend. We agreed to not turn them on until after thanksgiving, but I think Clark Griswold my husband has a different idea. You can see our house glowing from down the block.
It’s too early for a Christmas tree – but not too early to start some Christmas crafting.
This project is really easy, doesn’t cost a lot of money (unless you use nickles, dimes or quarters instead), just a little time, and lots of hot glue.
I purchased 3 paper mache cones “trees” at the craft store, about $1.30 each. Then I dug in my purse, in the couch, and through the coin jar for as many pennies as I could find. This is a great way to clear out all those pennies that you never use anyways.
I soaked the coins in vinegar and some dish soap to shine them up a bit. Warning: this is not the project for a germaphobe – money is DIRTY. The wash water was BLACK!
Start at the bottom, glue on a row all the way around, then add a second row overlapping the first. There will be times when the pennies don’t line up correct at the end – but with so much going on, you wont even notice the small “mistakes.”
I measured out a few spots along the cone and made lines as markers to make sure I wasn’t gluing the pennies on in crooked rows. My projects always tend to have a “slant” when I have to free-hand them.
Voilà! Three copper Christmas trees.
I love the way the pennies are all different – some shiny, some dull. I think they will really “POP” on the mantel once we decorate it with garland and lights!
WHOOOO’S having a baby?
Not I!
But I will say that Owls are all the rage right now. Have you noticed that? That’s why my friend Whitney and I chose to throw a Rustic Owl themed baby shower for our friend and trendy owl-lovin’ momma-to be, Jessica!
Jessica is not finding out the sex of the baby ( I don’t know how she can even stand not knowing!) so we kept the shower neutral, and a little more rustic than “baby”.
The first impression of any event begins with the invitation. Never forget that! There is no better way to let your guests know how rockin’ your party is going to be than to send them a rockin’ invite. And that is just what we did for this party.
Add gingham lined kraft envelopes and a touch of twine and burlap to make an ordinary invitation something unique.
Purchase your own custom owl invitations in my Etsy shop here!
At any shower or party, I think it’s fun to put the invitation on display. It adds a personal touch. For this shower I simply cut out a carstock “frame” and added green moss from any craft store for a mossy conversational piece on the beverage table.
We added natural elements to stick with the rustic theme. Burlap, wood, moss,and pine-cones to name a few.
Wrap and hot-glue a strip of burlap around a mason jar for an easy beverage display. Champagne cocktails in a mason jar are still classy, right? As long as they are served with striped paper straws – I think so!
Another easy DIY tip for any fall/winter parties; buy a bag of the cinnamon scented pine-cones at your local craft store. I got these at Michaels for $2.00 for about 10 pine-cones. With a piece of paper and a drop of hot glue they double as food labels (or place card holders), and room fresheners.
I can not take credit for any of the wonderful food at the party. That was all Whitney – the master in the kitchen >> check out her delicious food blog here
Sweet & Spicy Nuts
Pear, Goat Cheese & Balsamic Bruschetta (yum!)
Pumpkin Cupcakes with cloud frosting
And can you even believe how adorable these Apple Pie Pops turned out?
To make the base for these pops (which you could do to display cake pops as well) we used a large rectangular foam block (found in the floral department at a craft store) covered in hot glue and moss. Easy, quick and not a lot of ca$h.
One fun thing that our momma-to-be has been docomenting throughout her pregnancy is her beautiful growing baby bump. She takes photos each week next to a chalkboard and writes a small updated entry on the size of the baby, cravings, moods etc. We printed out the cards and hung them up for all the guests to look at!
Can this ‘lil pregnant momma get any cuter?!
What’s a shower without a custom burlap baby banner!
And a tree of well wishes and advise from all the shower guests for Jessica and her sweet baby.
This could be used at any party…wedding reception, birthday, wedding shower…just find some branches outside, put them in a nice jar or vase and send your guest of honor home with well wishes.
Thank you Jessica for allowing us to “shower” you with love and gifts for you and your little one!
My Etsy Site: It’s Official!
Happy Monday!
I want to update you all on a little somethin’ somethin’ that i’ve been working on for a while now. I’m proud to introduce you to Little Ivy Designs.
A few years ago I received a hand-sewn Christmas card from a friend and fell in love with the idea. A year later I made my own version for our family Christmas card and have used that same concept on wedding save the dates, birth announcements and holiday cards.
I custom design a card stock announcement, and sew on a professionally printed photo of the couple/family/baby etc.
Sleek and simple, yet unique with a sewn photo onto the card instead of just a print of a photo. It’s no secret that I’m a freak for texture, I love how the colored thread and the layer of the photo add a unique texture to the cards.
Check out my etsy site here >> LittleIvyDesigns
The site is new and a little empty, so stay tuned for lots of new designs and creative ways to make your special announcements. Everything is customizable so email me with design questions or requests.
I look forward to helping you and your friends/family share your special announcements!

